Create your first webhook url
Integrate WebhookBeam with LemonSqueezy
Integrate WebhookBeam with RevenueCat
Integrate WebhookBeam with PayPal
Integrate WebhookBeam with Shopify
Integrate WebhookBeam with Mailchimp
Integrate WebhookBeam with WooCommerce
Integrate WebhookBeam with Commerce Layer
Integrate WebhookBeam with Pipedrive
Integrate WebhookBeam with Kiwify
Integrate WebhookBeam with EasyPost
Integrate WebhookBeam with Pipedrive
1. First, create your webhook URL in our WebhookBeam app, and then copy it (check Create your first webhook URL).
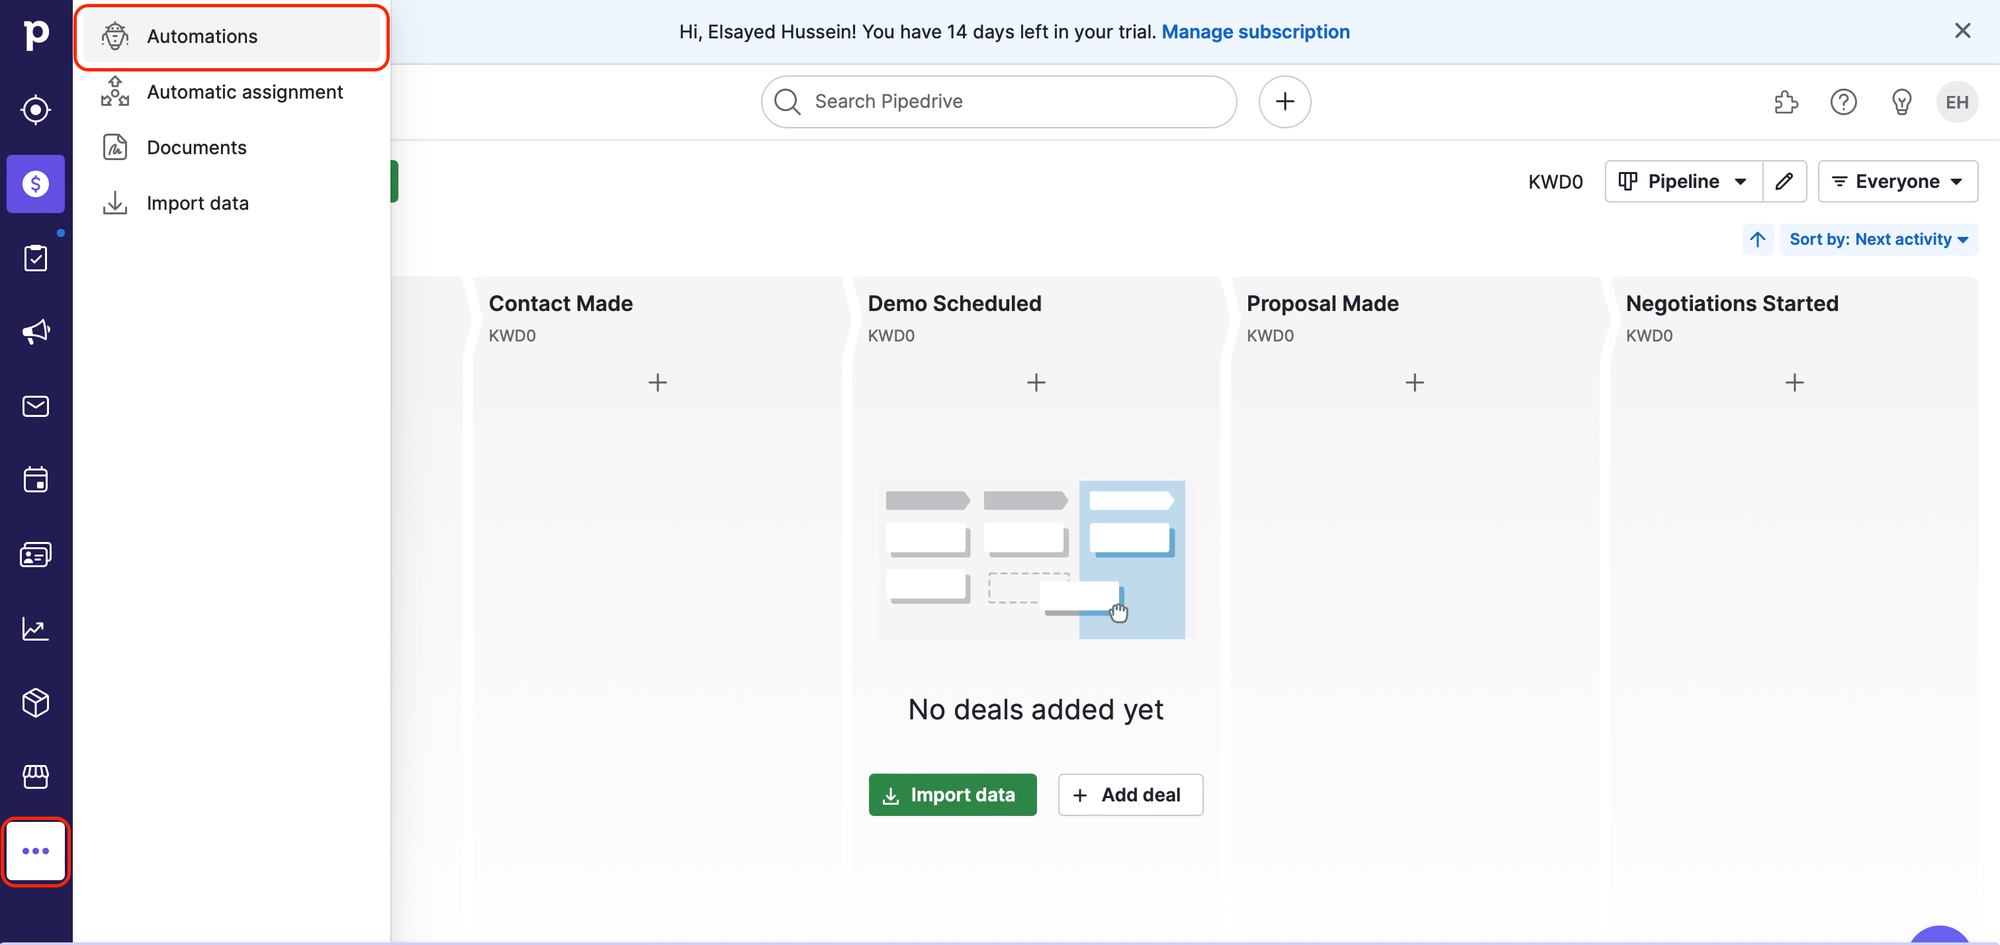
2. On your Pipedrive dashboard, click the three dots at the bottom of the left navigation, then click 'Automations'.
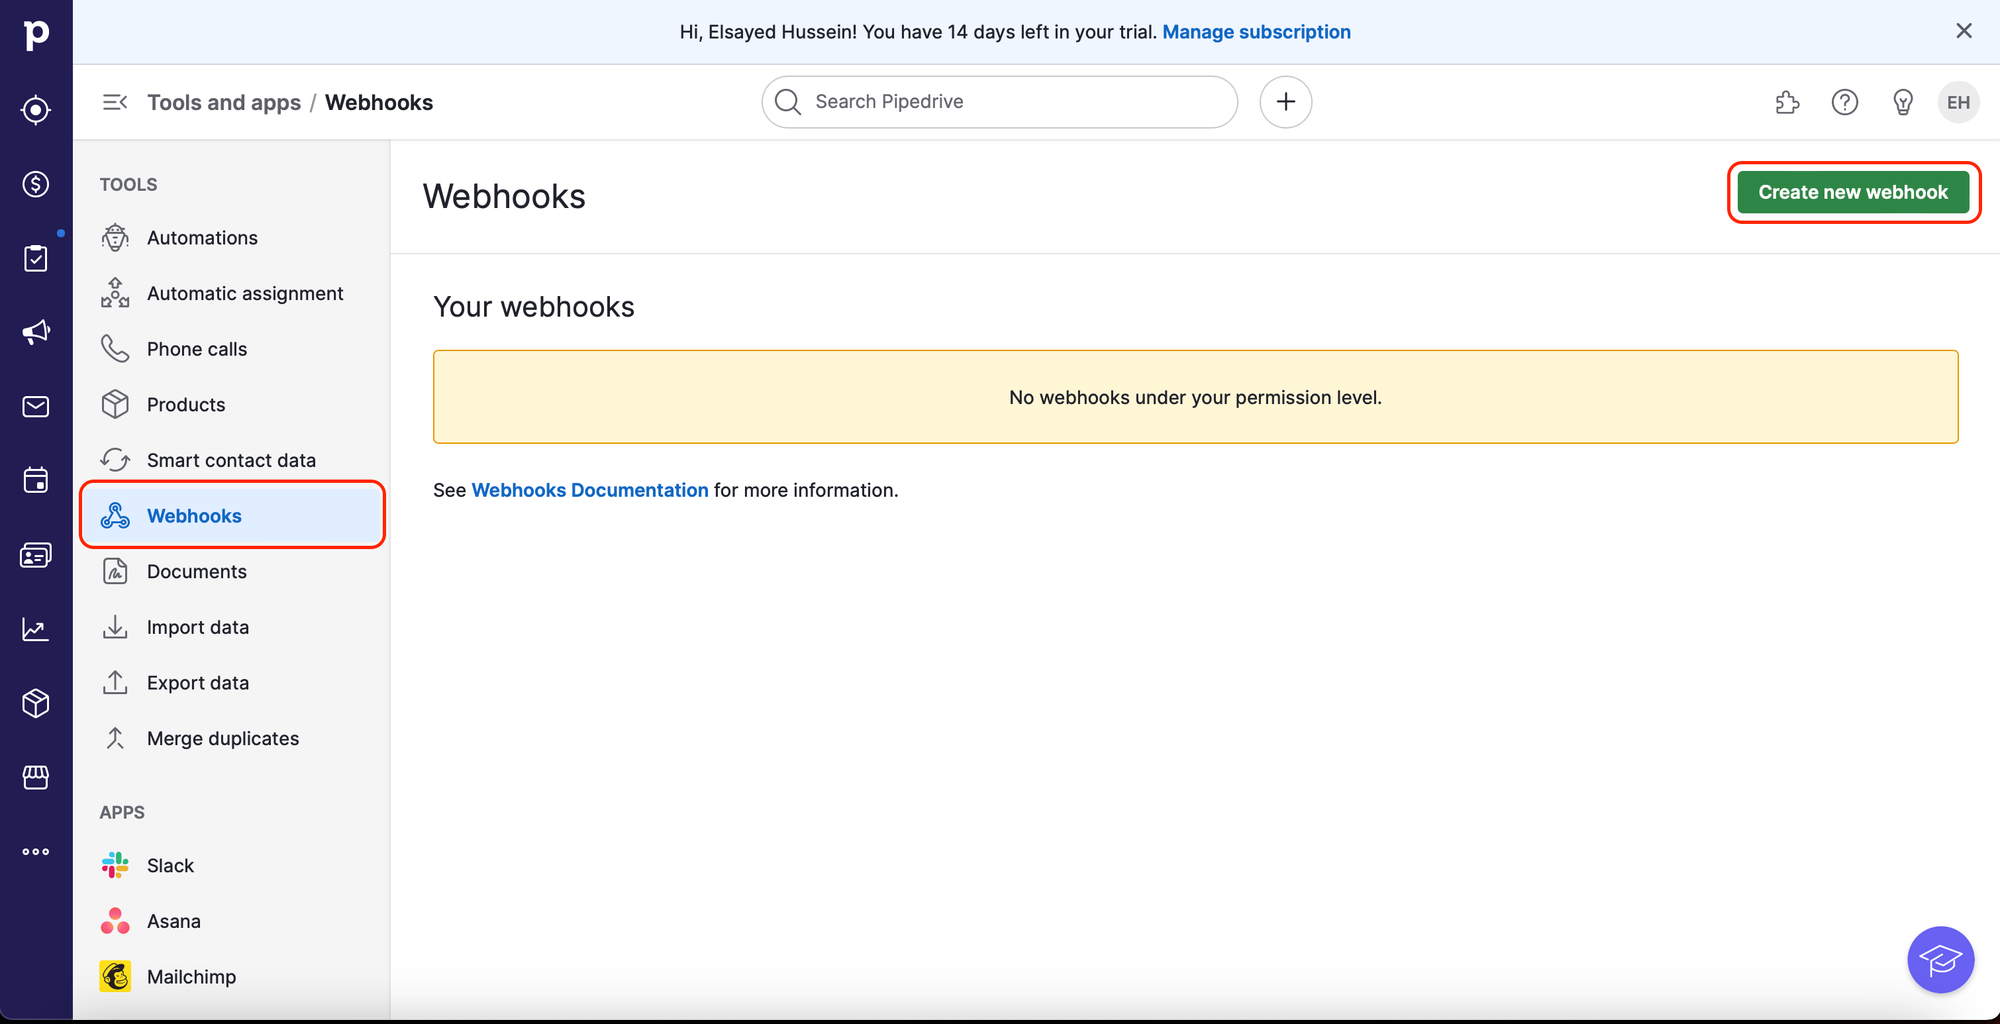
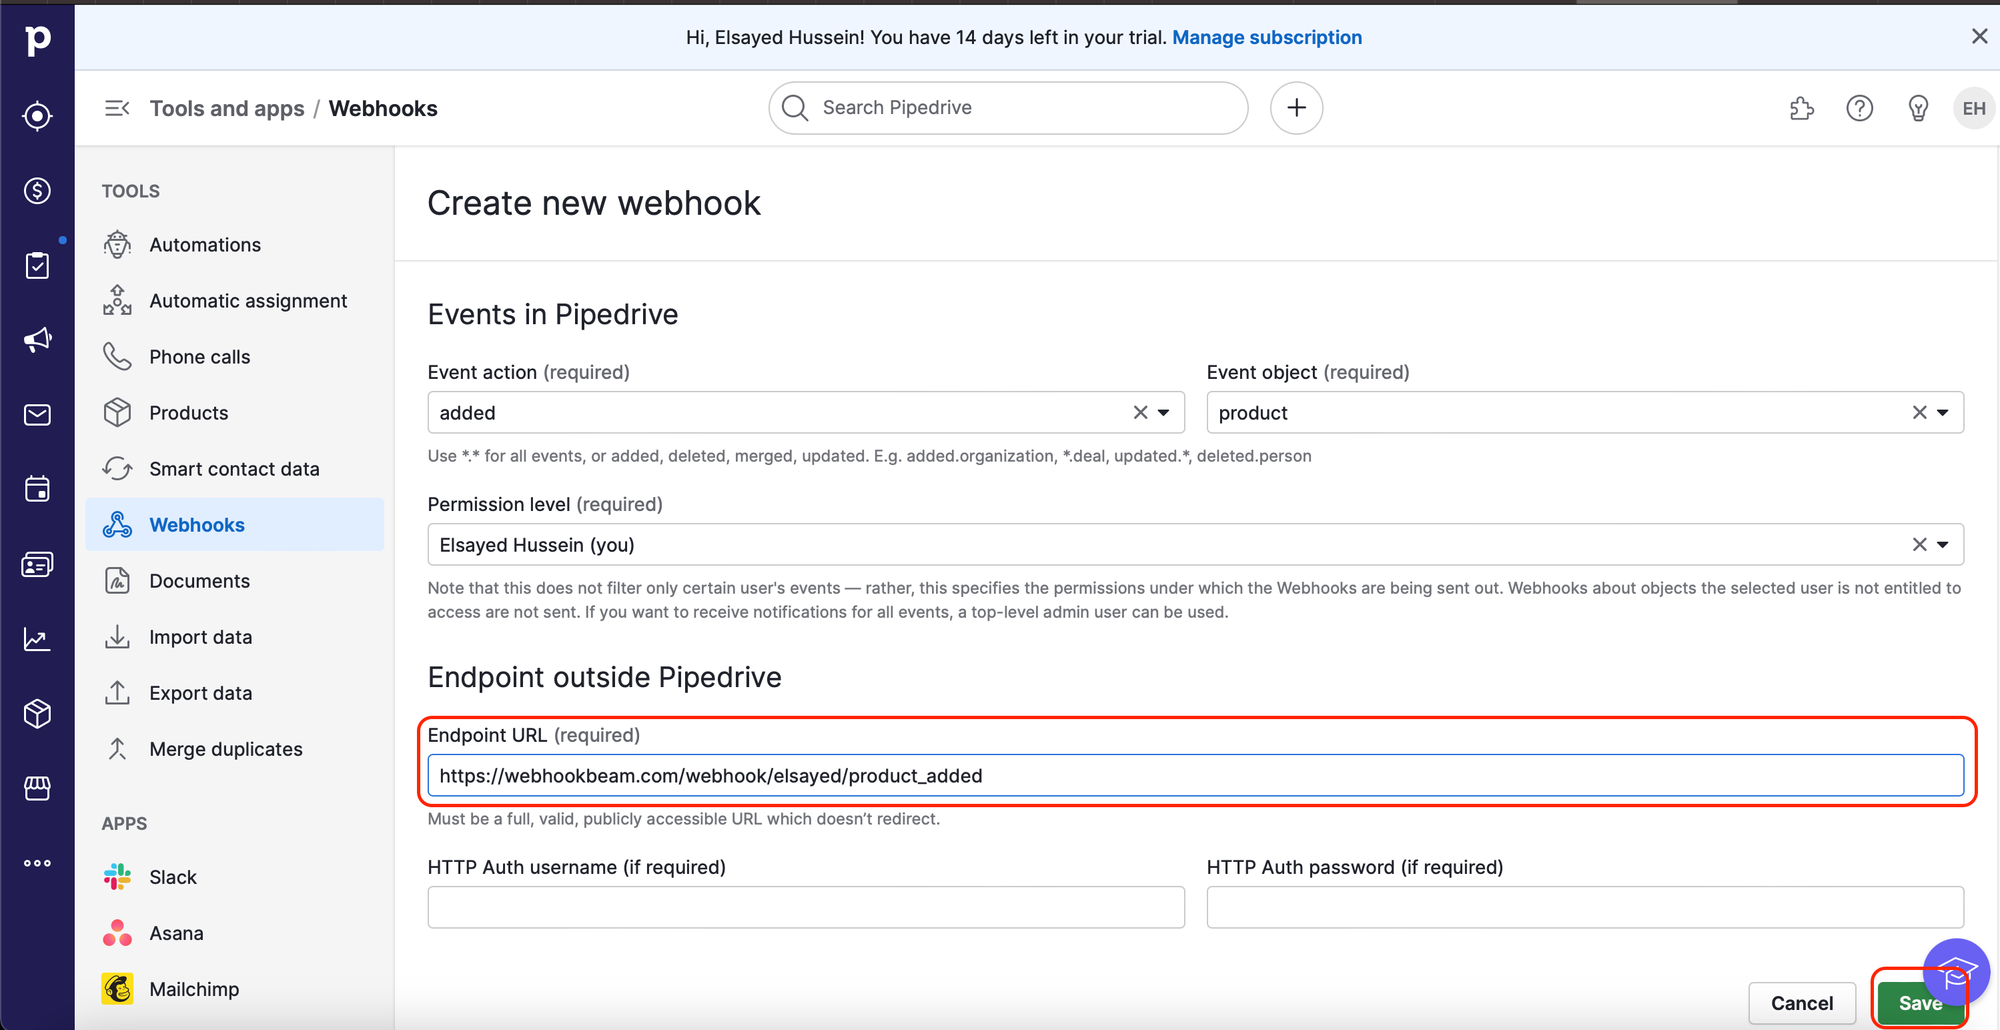
3. Select ‘Webhooks’, then click ‘Create new webhook’
4. Choose the appropriate ‘Event action’, and 'Event object' you want to listen for.
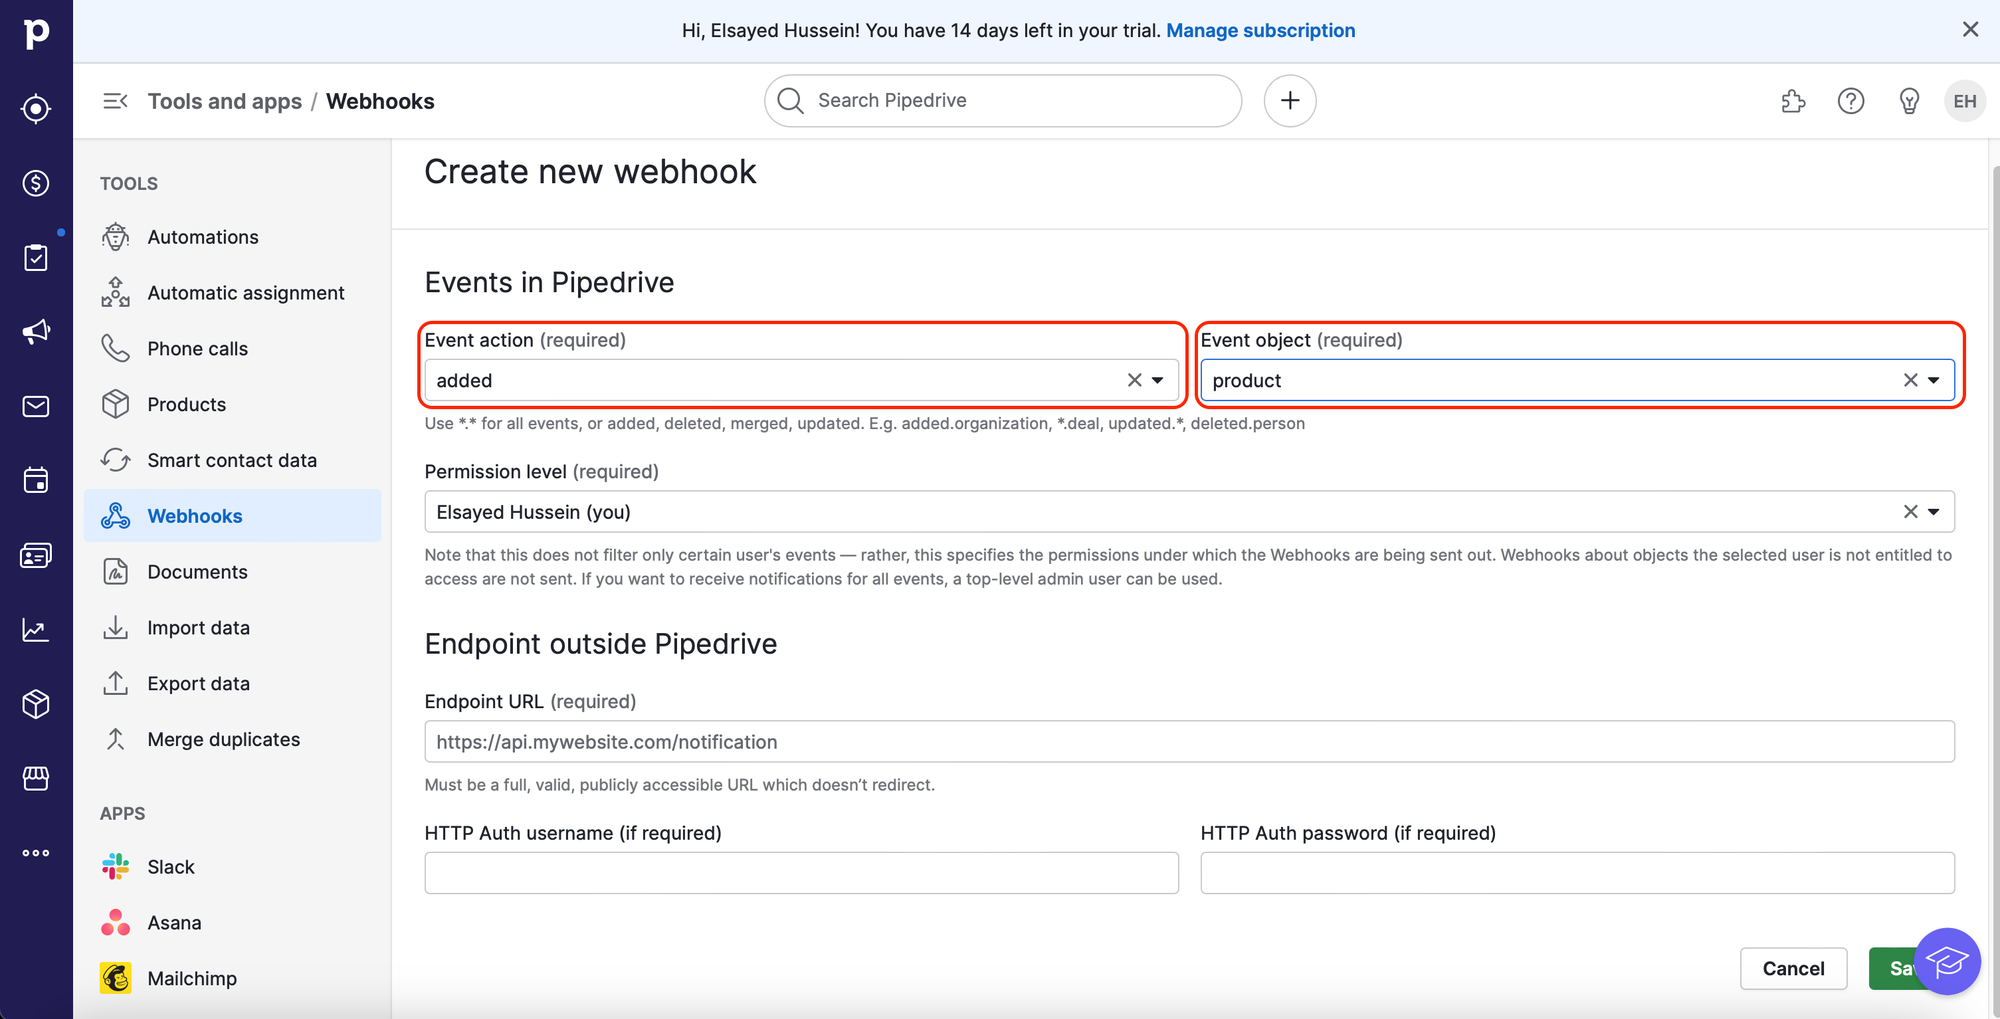
5. Enter the webhook URL (that you created in step 1) in the 'Endpoint URL' field, where you want Pipedrive to send the webhook. Then click 'Save’.
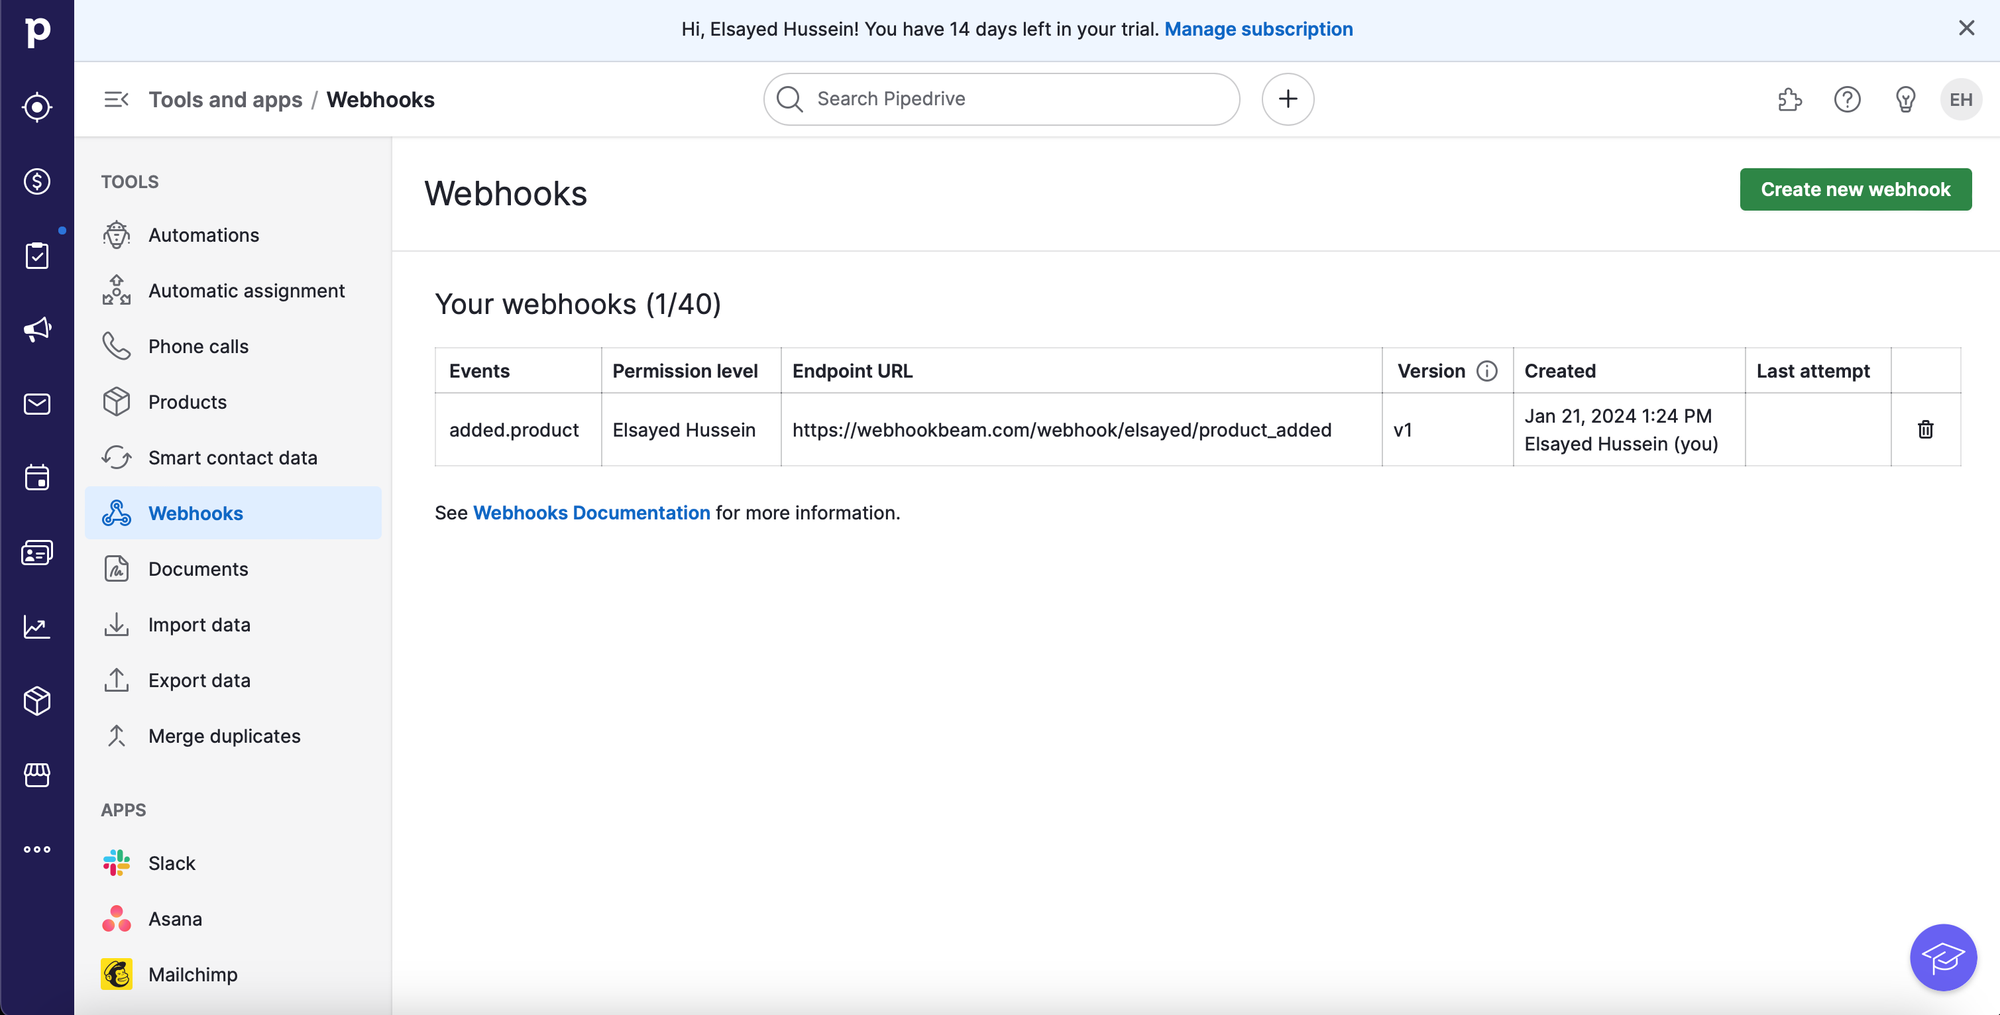
6. After saving, the webhook will appear in the list of webhooks